The types of shots in a film, also known as shot sizes, are what makes cinema so entertaining. Shots are pieced together so the story unfolds before your eyes, revealing information to tell a tale that makes an impact.
In the early days of film, a camera was placed on a tripod and the only thing it captured was the motion within the frame like a garden party or a couple kissing. (Scandalous!) That was entertaining back then, but when early filmmakers realized that they could tell a story by stringing various shot sizes together, things got much more interesting.
If you are learning to direct, it is important to have knowledge about how to use the camera in a scene. A Cinematographer will have input to help you, but you should be able to take the vision you have in your head and break it down into shots.
This is called a shot list. Shot listing is an important part of preparation and knowing why and when to use shots will make the task less daunting.
It is easy to confuse shot types (or shot sizes) with shot angles. The different shot types are about how much we see in a frame; shot angles are more about where the camera is placed. The first thing to keep in mind when learning about shot types is that each shot is designed to give the viewer information, so what you decide to show in a frame should be thought through.
Your primary objectives should be to put your story and characters in context, to reveal plot points and what is going on in a scene and to let the audience know how each character feels.
The basic types of shots in a film are:
- The extreme wide shot
- The wide, also known as a long shot
- The full shot
- The medium shot
- The medium close-up shot
- The close-up shot
- The extreme close-up shot
- The establishing shot
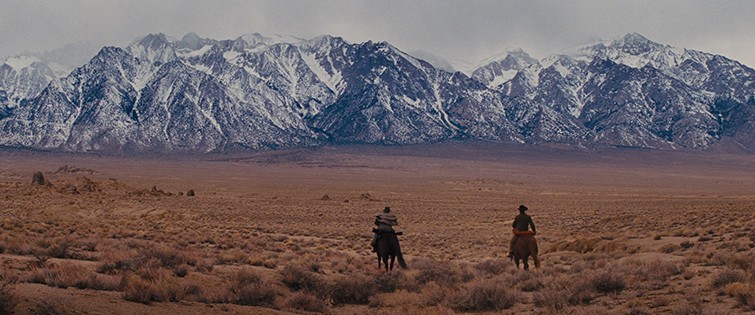
Still via Django Unchained.
The extreme wide shot or extreme long shot is all about showing the world in which the story takes place. In an extreme wide you will see large landscapes in the frame. Whether it is the desert or outer space, the audience should get a feel for the time and the place they are about to spend the next two hours.
Though characters can be introduced in an extreme wide, they would be very tiny in context to the backdrop, which is what you are highlighting with this shot. An extreme wide shot is often an establishing shot, which is explained below.
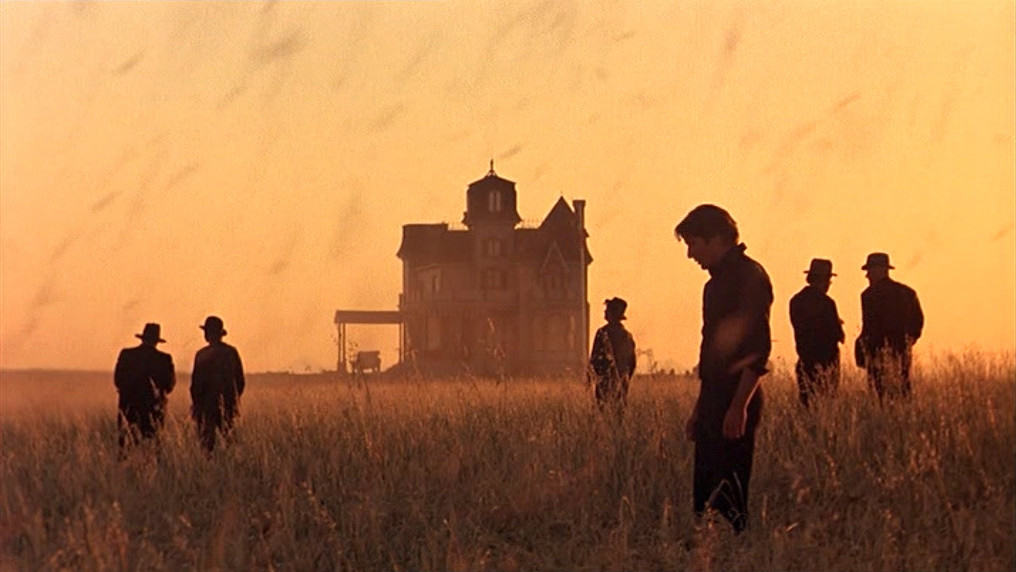
Still via Days of Heaven.
A wide shot, often referred to as a long shot, puts characters in context to the backdrop you establish in an extreme wide shot. The characters can be seen from head to toe and you see them in relation to the location or each other.
You can use a wide shot to show how your character is small in relation to the vast surroundings, like a little girl in awe of a large painting or a woman carrying water over a large plain. Of course, a wide shot might not have a character in it at all and it, too, can be used as an establishing shot.
When the term long shot is emphasized, it can mean that the camera is farther away from the subject, making them even smaller.
A wide shot can also be a master shot, which is used to introduce a new location like a dining room or restaurant. It gives the audience a sense of geography so when the camera goes in tighter, they can understand who is where.
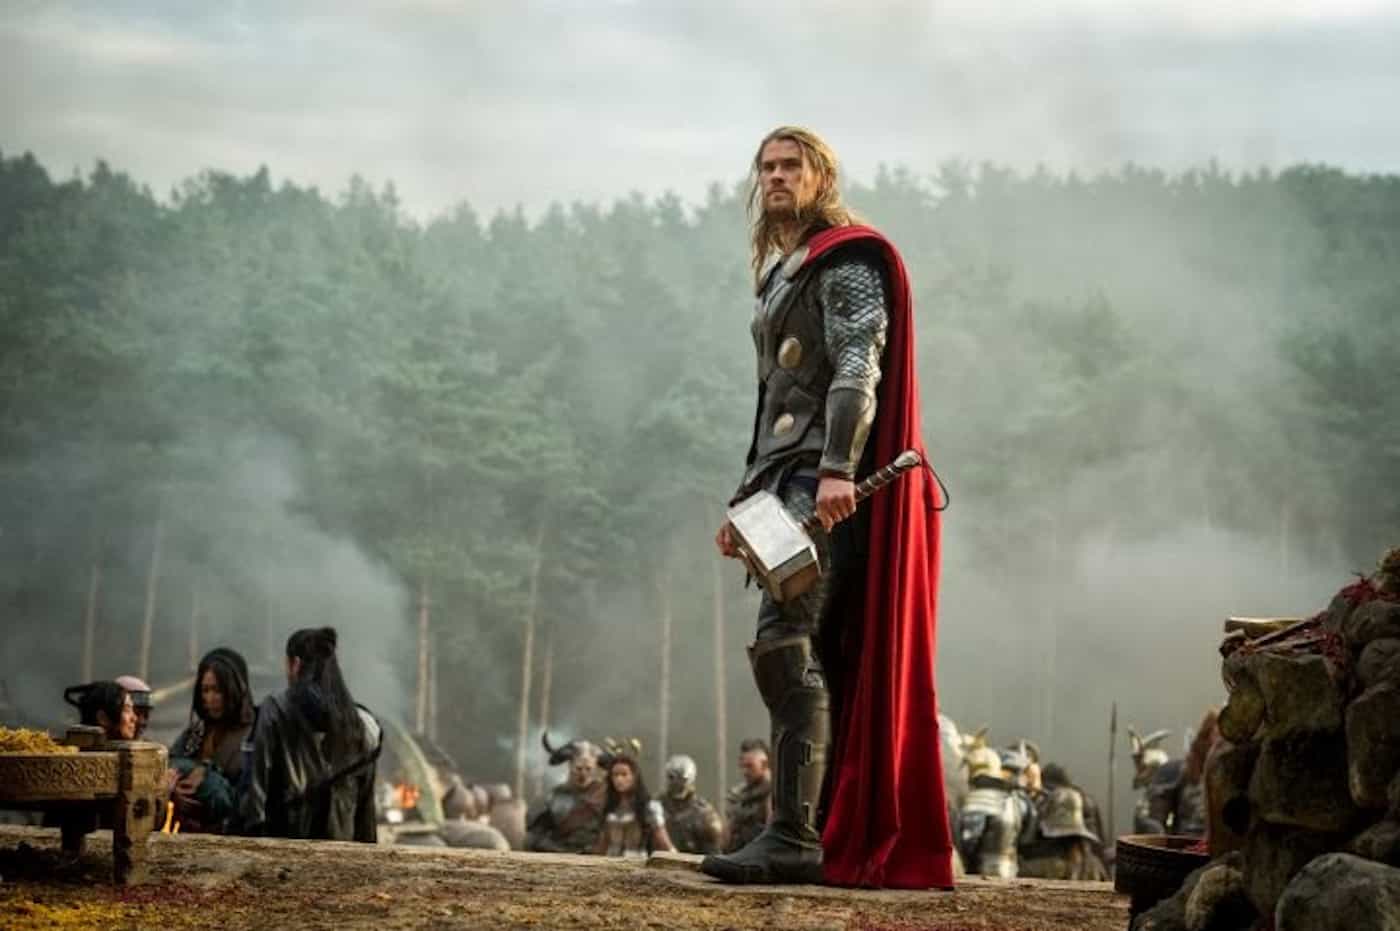
Still via Thor.
A full shot is different from the wide because it focuses more on the character in the frame. The character is full body from head to toe again, but the location is no longer the focus. In this shot you might want to show how a character dresses or how a character moves: awkwardly, confidently, etc.
You can also reveal what they are doing, like packing a suitcase or ordering a train ticket. You can give the viewer information but not all of it, yet.
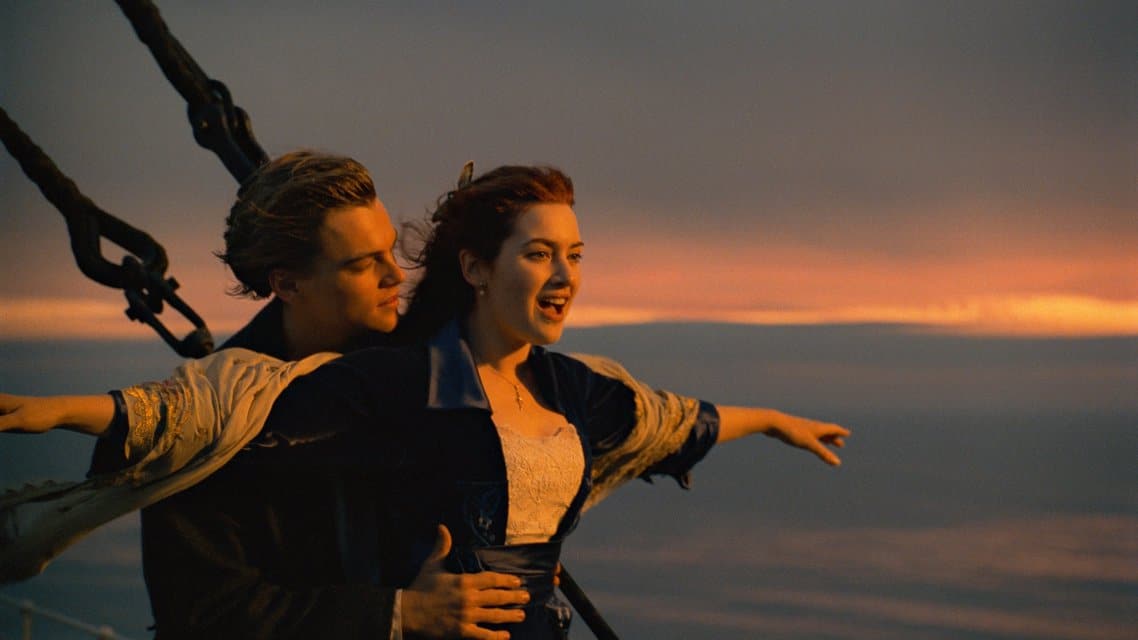
Still via Titanic.
The medium shot shows your character from the waist up. (There is a debate about this, but you will get a feel for it.) In the old westerns, the character was often shown from the hip up which is now known as a cowboy shot.
Again, this shot is about revealing information. You can see more detail than you can in a wide shot. The reason the westerns had to reveal the hips is because of the gun holsters. If you didn’t show the hips, when a cowboy was ready to draw you would lose a lot of important action.
Medium shots are often used in dialog scenes. As we get closer to our subjects we can see things that we wouldn’t catch in a wide, like body language. We can see crossed arms or someone who talks with their hands.
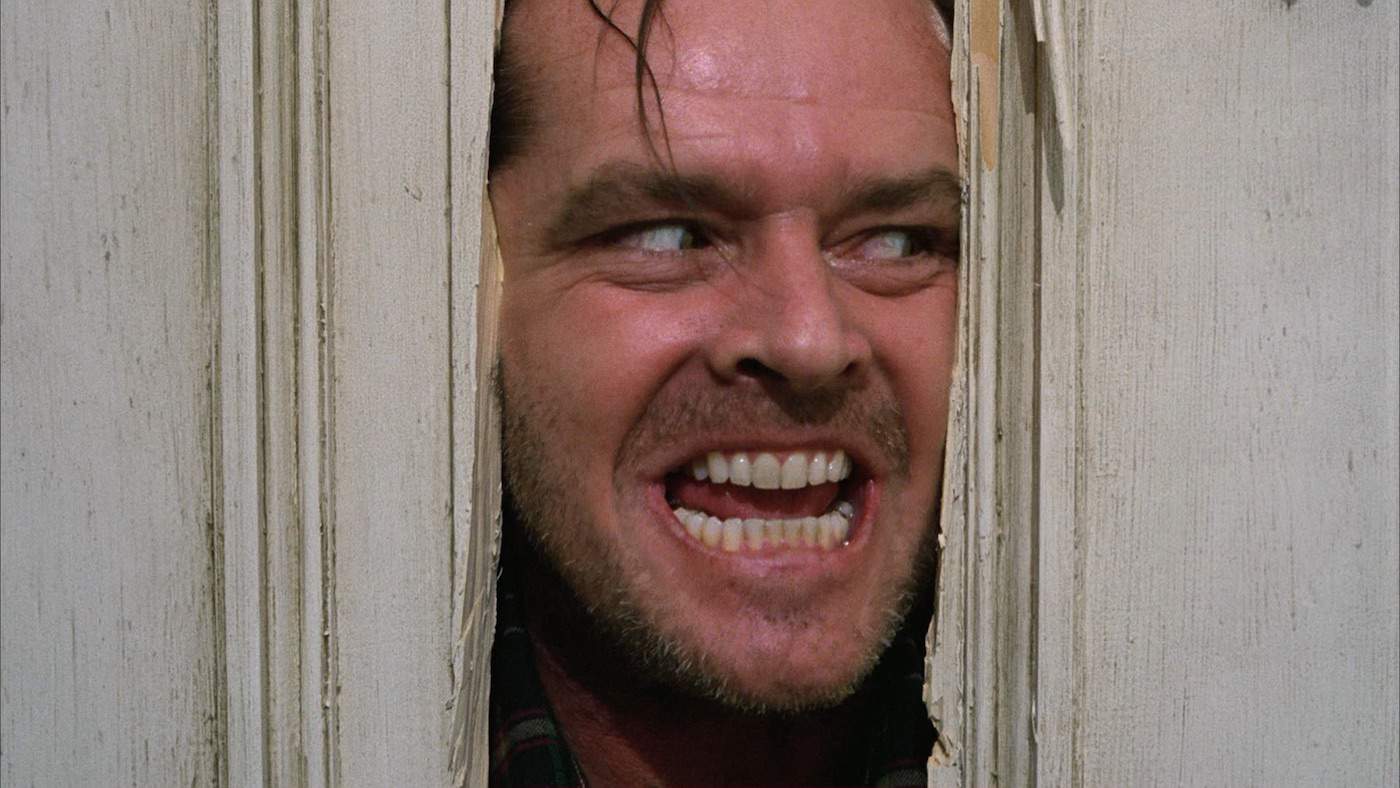
Still via The Shining.
A close-up frames the character’s face. In a close-up shot one can see even more detail that tells us how a character feels. A close-up highlights emotional clues in the eyes and you can see a twitch or a tear that you might miss in a medium shot. It is by its nature more intimate so the effect is often that the audience can feel what the character is feeling.
A close-up can also be used to show things such as a tapping foot or the sliding of a ring on a finger, but these shots should be used sparingly and have a flow, otherwise, they can be jarring. Most importantly, they should mean something because the audience will be looking for importance in anything you decide to show them.
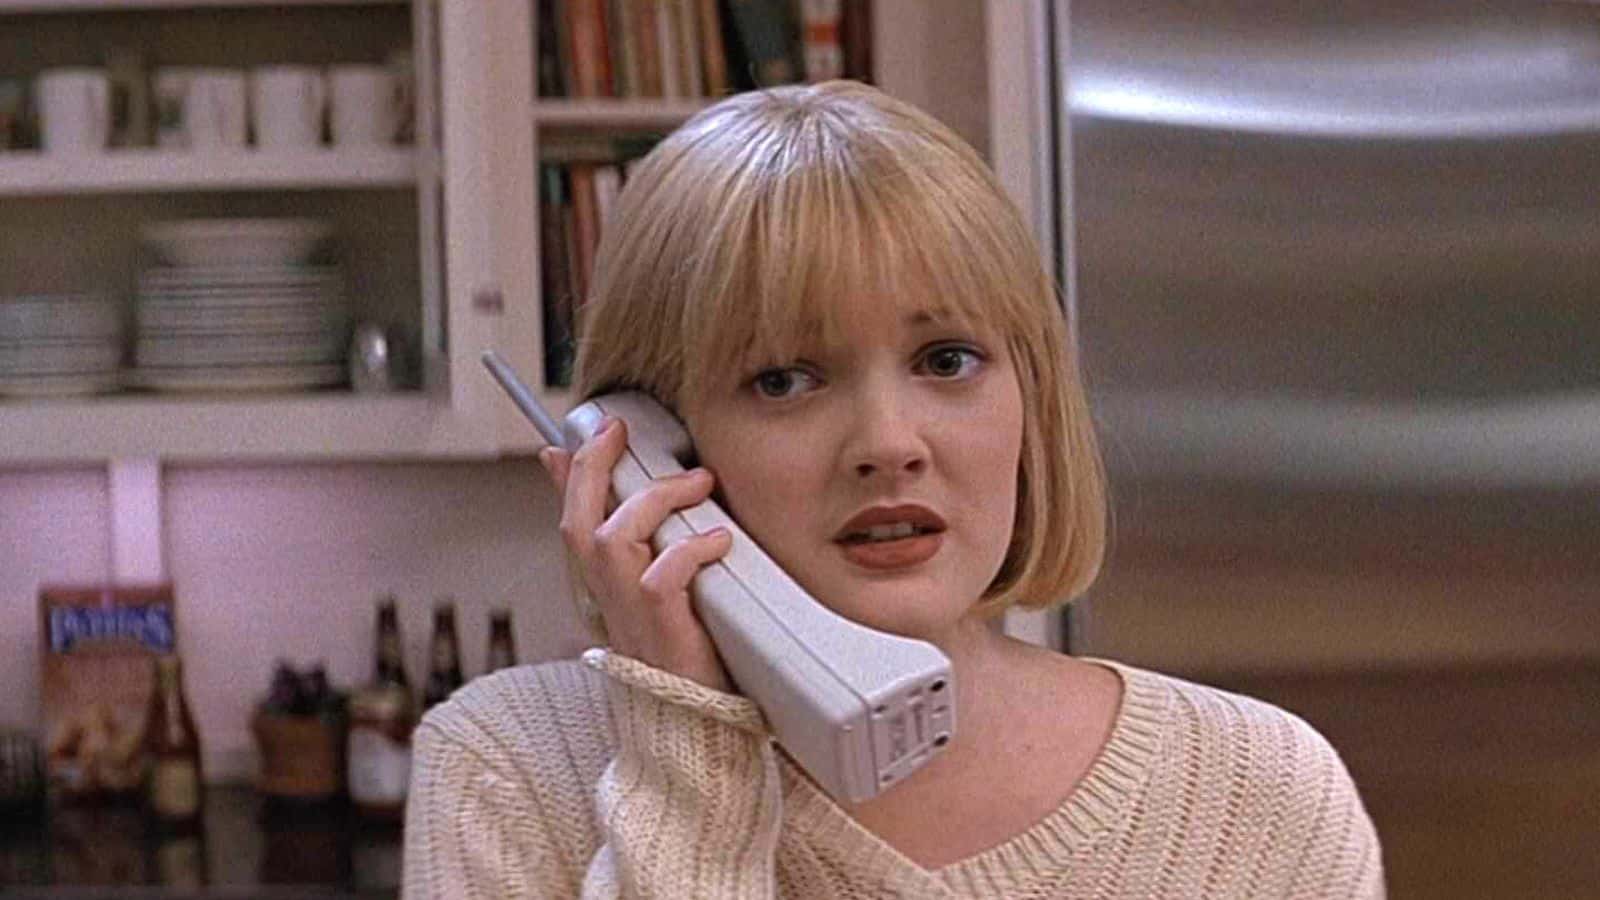
Still via Scream.
Halfway between the close-up and the medium shot is the medium close-up that frames the subject from the shoulders up. This shot might be used if you want to show more body language as you capture some emotion and facial expressions.
You might also use it if you are building up to an emotional climax. You can reveal more information with a medium close-up, but it is not as intimate as a close-up.
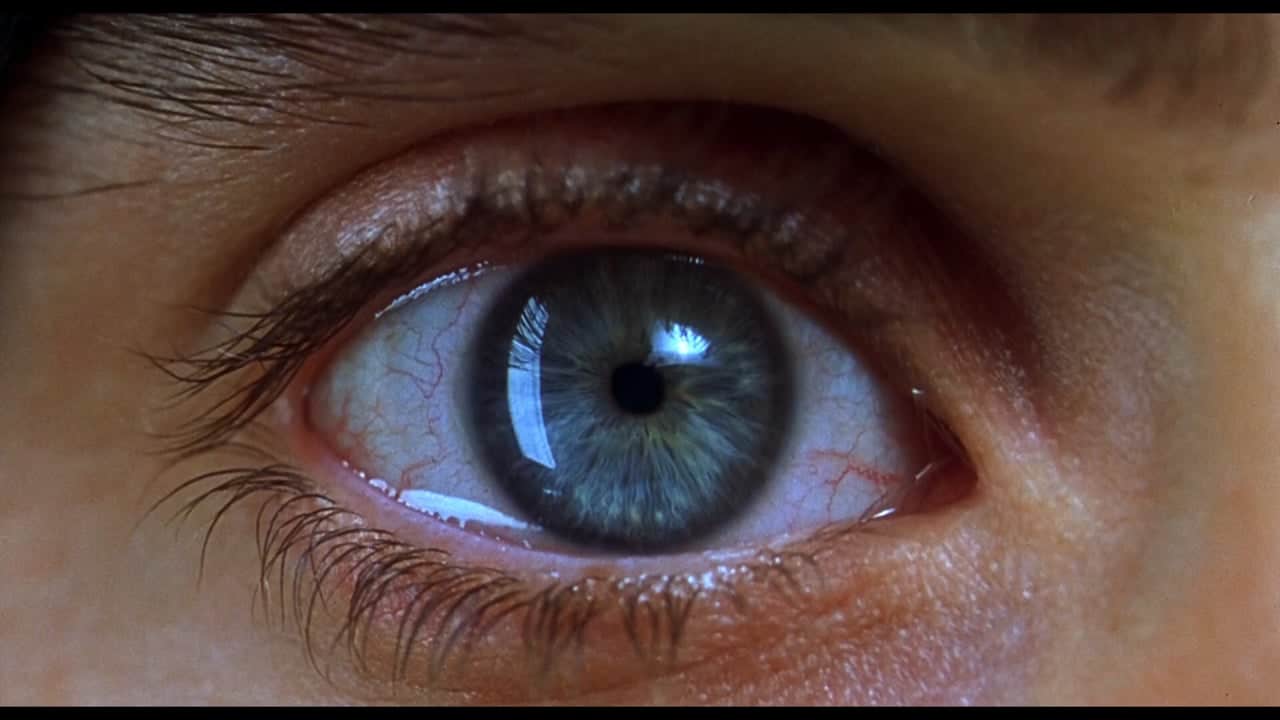
Still via Requieum for a Dream.
An extreme close-up frames even tighter on a face (or subject), highlighting facial features more. It usually frames a particular part of the face like the eyes or the mouth. It is even more intimate than the close-up and is almost uncomfortably close, so the viewer is more apt to feel whatever the Actor is conveying, which is why it is used to show more intense emotion and is often used as drama increases.
Still via Seinfeld.
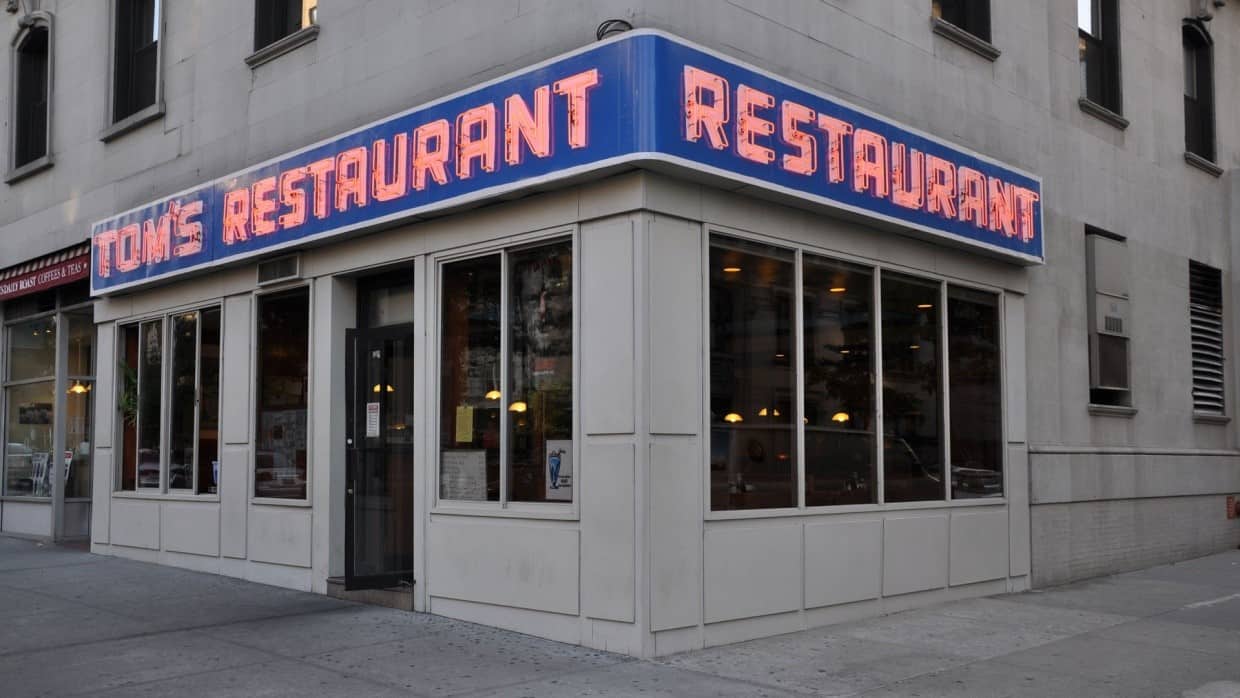
The establishing shot is included in this list because it’s so important to let the viewers know where they are as the story moves from location to location in a film. The establishing shot can be a mixture of shot sizes, so it is technically not a shot type.
It tells the viewer where in the world the story takes place. It can be an extreme wide sweeping shot with a crane or a drone to show a particular time period or details of a location, like a burned forest or traffic jam or it can be a wide exterior of a building like a museum. You can also use tighter shots that show pieces of a location like an office.
For example, you can show a close-up shot of wheelchair wheels, an IV and an MRI machine to show you are in a hospital. But one must choose those shots wisely. A shot of an MRI machine should mean something.
Perhaps someone is getting diagnosed, or perhaps the main character is the operator of the MRI machine. Deciding what information you want to reveal to the audience can be the difference between hooking viewers or confusing them.
All these shots are used to “cover” a scene. Each time the camera is moved is a new setup and each of these pieces are used to cut together your movie. What kind of coverage you get will vary from scene to scene, depending on what you want to highlight from moment to moment.
You must consider story points, action, and emotion. There is a myth that you can cover each scene with a wide, a medium and close-up shots, but if you do this without thought, your audience might lose interest. Besides, you have a vision in your head and I am sure it is much more interesting than that! But don’t overthink it.
A scene can be covered in one wide shot – a guy walks out of a restaurant and gets into his car. A medium shot might be all it takes to show someone go to a Bank Teller to make a withdrawal. You shouldn’t get coverage just for the sake of getting it. Choose shots that will tell your story. If the guy going to the Bank Teller intends to rob the bank, then perhaps a close-up will reveal his sweaty brow and nerves.
As you get a grasp on the types of shots in a film, move on to learn about camera angles, composition, and when and how to use camera moves. All of these things are creative ways to get coverage and to help you tell your story visually and viscerally so you, too, can make an impact.
